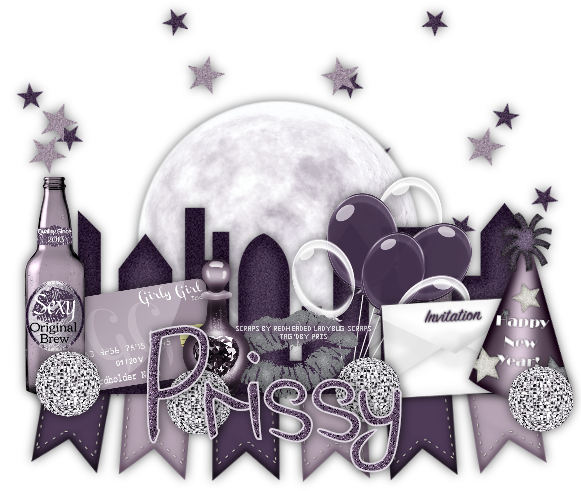
2 CT tags for Redheaded Ladybug Scraps using the kit New Year Glitz available at Pink Paradox Productions HERE.
Thursday, January 23, 2014
Sunday, January 12, 2014
PTU Tut - A Perfect Day
PTU Tut - A Perfect Day
==============
♥Supplies♥
Tube
===
You'll need a tube with at least half her body for this tut.
Flower by VeryMany. You can find it HERE.
This is a Pay To Use tube. You need a license to use it. Do not use this tube without a license.
Scrap Kit
======
A Perfect Day by Pimp'd Designz.
You can find this beautiful kit @ PMTw/S HERE
Font
===
Grand Hotel
Mask
===
DBV Mask 89
You can find it @ Designs by Vaybs
------------------------
♥Let's Start♥
Open a new canvas 600x600px and 72dpi. You can resize later.
Open pd13-frame-03.png. Resize it a bit and slightly rotate it to the right.
Open the following elements and place them how I have mine. Resize if needed. See my tag for reference.
pd13-splash.png - after you place it below your frame layer, click inside your frame with your magic wand and expand the selection by 3 and hit delete on your keyboard.
pd13-leaves-01.png
pd13-flower-04.png
pd13-flower-03.png - duplicate
pd13-flower-02.png - duplicate
pd13-net-01.png
pd13-sandals.png
pd13-glass.png
pd13-sand-dollar.png
pd13-tan-oil.png
pd13-ribbon-03.png
Copy and paste your tube as a new layer under your frame, duplicate it and move one of them above your frame.
Use your magic wand to select inside the frame, expand by 1, invert, and erase the parts of the tube you don't want sticking out
of your frame. Both the top and bottom tube layers.
Now go through and add drop shadows to everything except pd13-ribbon-03.png and pd13-splash.png.
Add your mask with pd13-pp-02.png and adjust it to your liking.
Selections>Select All. Selections>Clip to Canvas. Image>Crop to Selection.
Crop your tag and resize as desired.
Add your copyright and name.
Save as .png or .jpg, whichever you prefer.
That's it! I hope you enjoyed my tut!
Friday, January 10, 2014
CT Tag and Freebie Cluster Frame using My Sweet Valentine
Tonight I have a freebie cluster frame made using Queenie Signatures N
Kits' newest kit "My Sweet Valentine". I had a lot of fun with this one
and I know you will too. You can purchase her kit @ Thrifty Scraps HERE.
You can download my cluster frame on my blog HERE.
And here's the tag I made with it:
Wednesday, January 1, 2014
CT Tags: Moonlight Passions by Redheaded Ladybug Scraps
Two tags using the kit "Moonlight Passions" by Redheaded Ladybug Scraps. You can purchase this kit @ Pink Paradox Productions http://pinkparadoxproductions.com/store/index.php?main_page=product_info&cPath=1_64&products_id=149
Saturday, December 21, 2013
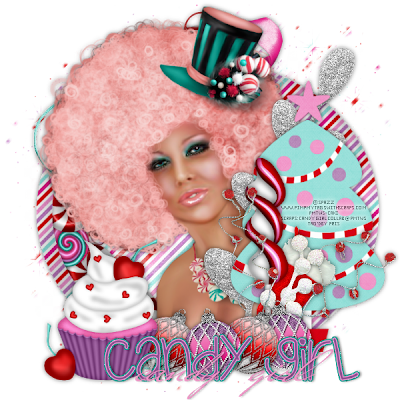
PTU Tut - Candy Girl Part 2 & A Snag
PTU Tut - Candy Girl Part 2
==============
♥Supplies♥
Tube
===
You'll need a close up tube for this tut.
Candy Girl by Spazz. You can find it HERE.
This is a Pay To Use tube. You need a license to use it. Do not use this tube without a license.
Scrap Kit
======
Candy Girl Collab by the designers @ PMTw/S.
You can find this beautiful kit @ PMTw/S HERE.
Font
===
Versitia
Plugins
=====
Eye Candy 4000 - Glass
Eye Candy 5 Impact - Perspective Shadow
Loka's Software - 3D Shadow
Template
======
CandyGirlTemp by Cakes - Part of the Candy Girl Collab HERE.
My Supplies
=========
Merry Christmas Wordart and Perspective Ribbon Shadow
Download HERE
------------------------
♥Let's Start♥
Open your template.
Open the following papers and place them on the template layers you'd like:
Pimp'd Desigz Part
pd13-pp-06.png
pd13-pp-010.png
CandyCats' Part
paper2.jpg
paper3.jp
paper9.jpg
paper14.jpg
Digital Indulgence's Part
DI_CandyGirlPaper8.jpg
For template layers 6 and 7 I just recolored them with a color from the papers and added noise to them with the following settings:
Random
40
Monochrome checked
Selections>Select All. Selections>Clip to Canvas. Image>Crop to Selection.
Open the following elements and place them how I have mine. Resize if needed. See my tag for reference.
Digital Indulgence's Part
DI_Snowflake1.png
Pimp'd Designz' Part
pd13-candy-cane.png
pd13-flower-04.png
CandyCats' Part
tree3.png
bead2.png
bead4.png
bead4.png
CandyTwirl2.png
lollipop.png
Ornament4_bluepurple.png
Ornament4_pink.png
snowflake3.png
SwirlStckLolli2.png
Designs by Sarah's Part
sb-pmt-candygirl-beads 2.png
sb-pmt-candygirl-branch.png
sb-pmt-candygirl-shoe.png - duplicate one and mirror
sb-pmt-candygirl-snow.png
sb-pmt-candygirl-ribbon 1.png
sb-pmt-candygirl-flower 1.png
sb-pmt-candygirl-bow 5.png
Go to the top layer of the Candy Girl wordart. Selections>Select All. Selections>Float. Selections>Defloat. Add paper pd13-pp-06.png.
Selections>Invert. Make your paper layer active and hit delete on your keyboard.
Now go to Effects>Plugins>Eye Candy 4000>Glass with the following settings:
Now we're going to add perspective shadows to a few elements to make them look like they're on the ground.
Some elements are pre-shadowed so we don't have to mess with those. Leave them as they are.
Ornament4_bluepurple.png and Ornament4_pink.png will get the following shadow:
sb-pmt-candygirl-shoe.png (you should have 2 shoes) will get the following shadow:
sb-pmt-candygirl-ribbon 1.png will get the shadow I provided you in my supplies.
Candy Girl wordart on your template will get the following shadow:
Shadow the rest of your elements with Effects>3D Effects>Drop Shadow with the following settings:
0
0
50
10
Black
Add the Merry Christmas wordart I provided you in my supplies and place it on top of the layer named "1" in your Layer's Palette.
Position it how I have mine (or how you want it).
Open your tube and copy and paste as a new layer. Place it on top of your Oval template paper layer.
Duplicate your tube one time and Adjust>Blur>Gaussian Blur>3 and then change the blend mode to Lighten.
Make your oval template layer active and with your magic wand, click it.
Selections>Invert.
Hit delete on your keyboard on both tube layers.
Selections>Select All. Selections>Clip to Canvas. Image>Crop to Selection.
Crop your tag and resize as desired.
Add your copyright and name.
Save as .png or .jpg, whichever you prefer.
That's it! I hope you enjoyed my tut!
And here's a snag for you right before Christmas!
Tuesday, December 10, 2013
PTU Tut - Candy Girl Part 1 & Snags
PTU Tut - Candy Girl Part 1
==============
♥Supplies♥
Tube
===
You'll need a close up tube for this tut.
Candy Girl by Spazz. You can find it HERE.
This is a Pay To Use tube. You need a license to use it. Do not use this tube without a license.
Scrap Kit
======
Candy Girl (this is part of the Candy Girl Collab at PMTw/S) by Grunge & Glitter
You can find this beautiful kit @ PMTw/S HERE.
Font
===
mtf santa and Versitia
Mask
===
DBV Mask 156 You can find it HERE.
------------------------
♥Let's Start♥
Open a new canvas size 600x600 px and 72 dpi. You can resize later if you want.
Open frame1.png.
Open candy1.png and candy2.png. Add them both to the same canvas, give them a nice drop shadow, and merge them together.
See my tag for placement before merging.
Copy and paste your merged candies under your frame layer and duplicate them 6 times. You should now have 7 of them.
Place them around (rotate as needed) the inside edge of the thin part of the frame. No need to place them under the thicker part because it will be covered.
Open the following elements and place them how I have mine. Resize if needed. See my tag for reference.
ribbon.png
bow1.png
glitterleaves.png
tree.png
stocking.png
lollipop1.png
deco1.png
ornament1.png - duplicate once
ornament2.png - duplicate once
cupcake1.png - mirror
Selections>Select All>Clip to Canvas. Image>Crop to Selection.
Place a nice drop shadow on each layer that compliments the tag.
Open your tube and copy and paste as a new layer and place it under your frame layer.
Duplicate your tube one time and move it above your frame layer.
Make your frame layer active and with your magic wand, click inside the frame.
Selections>Modify. Selections>Expand by 2. Selections>Invert.
On your bottom tube layer, hit delete on your keyboard. On your top tube layer, erase the parts that are out of the frame.
Add a drop shadow to the top tube layer.
Open your mask and add paper1.jpg to the bottom of your tag.
Add your copyright and name.
Save as .png or .jpg, whichever you prefer.
That's it! I hope you enjoyed my tut!
Here are the snags:
Thursday, December 5, 2013
PTU Tut - Save the Boobies Part 3
PTU Tut - Save The Boobies Part 3
==============
♥Supplies♥
Tube
===
You'll need a close up tube for this tut.
Cowgirl by Verymany. You can find it HERE.
This is a Pay To Use tube. You need a license to use it. Do not use this tube without a license.
Scrap Kit
======
Save the Boobies (this is part of the Save the Boobies Collab at PMTw/S) by Alika's Scraps
You can find this beautiful kit @ PMTw/S HERE.
Font
===
Versitia
Plugins
=====
Xero - Soft Vignette
Template
======
BCA3.psd - BCA Collab Templates by Amy & Leah's Gimptastic Tuts
------------------------
♥Let's Start♥
Open the template BCA3.psd and delete the credits.
Merge the circle 1 layer down so both your circle 1 and circle 2 are on the same layer. Then merge circle 3 down to circle 4.
Open as_paper04.jpg and copy and paste as a new layer on top of the rect layer.
Make the rect layer active and selections>select all, selections>float, selections>defloat, selections>invert. Make your paper layer active
and hit delete on your keyboard.
Open as_paper08.jpg and copy and paste as a new layer on top of the thin rects 2 layer.
Make the thin rects 2 layer active and selections>select all, selections>float, selections>defloat, selections>invert. Make your paper layer active
and hit delete on your keyboard.
Open as_paper06.jpg and copy and paste as a new layer on top of the thin rects 1 layer.
Make the thin rects 1 layer active and selections>select all, selections>float, selections>defloat, selections>invert. Make your paper layer active
and hit delete on your keyboard.
Open as_paper03.jpg and copy and paste as a new layer on top of the thin rect 3 layer.
Make the thin rect 3 layer active and selections>select all, selections>float, selections>defloat, selections>invert. Make your paper layer active
and hit delete on your keyboard.
Open as_paper05.jpg and copy and paste as a new layer on top of the circle 1 layer.
Make the circle 2 layer active and selections>select all, selections>float, selections>defloat, selections>invert. Make your paper layer active
and hit delete on your keyboard.
Open the following elements and place them how I have mine. Resize if needed. See my tag for reference.
as37.png
as04.png
as33.png - duplicate and move slightly to the left and down a little.
as03.png
as32.png - Image>Rotate Right
as43.png
as41.png
as23.png
Selections>Select All>Clip to Canvas. Image>Crop to Selection.
Place a nice drop shadow on each layer that compliments the tag.
Open your tube and copy and paste as a new layer and place it under your thin rect 3 shadow layer.
Duplicate your tube one time and Image>Mirror. Merge the two tube layers together and duplicate once.
Make the top tubes layer active and go to Adjust>Blur>Gassian Blur>3.00
Change the blend mode to Screen.
Add a drop shadow to the bottom tubes layer.
Now open up a slightly larger layer of your tube and paste it under your tubes layer.
Go to Adjust>Hue and Saturation>Hue/Saturation/Lightness and just check the box that says colorize.
Now go to Effects>Plugins>Xero>Soft Vignette with the following settings:
Grab your magic wand and click inside thin rect 3 layer, Selections>Modify, Selections>Expand by 2, Selections>Invert and on each tube layer hit delete on your keyboard.
Selections>Select All>Clip to Canvas. Image Crop to Selection.
Make your words 4 layer active and add a drop shadow with the following settings:
Vertical- 0
Horizontal- 0
Opacity- 60
Blur- 10
Color- white (#ffffff)
Repeat the drop on your words 2 layer but instead of white use #fd508a.
On your words 1 layer, go to Effects>Texture Effects>Weave with the following settings:
On your words 3 layer, go to Effects>3D Effects>Cutout with the following settings:
Add your copyright and name.
Save as .png or .jpg, whichever you prefer.
That's it! I hope you enjoyed my tut!
Subscribe to:
Posts
(
Atom
)


